Leash Pressure/Loose Leash Walking
Having a dog that pulls and yanks on a leash is no fun. Teaching them what leash pressure means and how to turn it off becomes very valuable in training and on walks.
Overview
Leash training prevents your dog from pulling, protecting both you and your dog’s neck. It’s not safe for your dog to pull on a collar, as it can harm their throat. Since dogs are usually on a leash outdoors, teaching them not to pull benefits everyone.
This training helps your dog stay aware of their position relative to you, promoting focus and engagement.
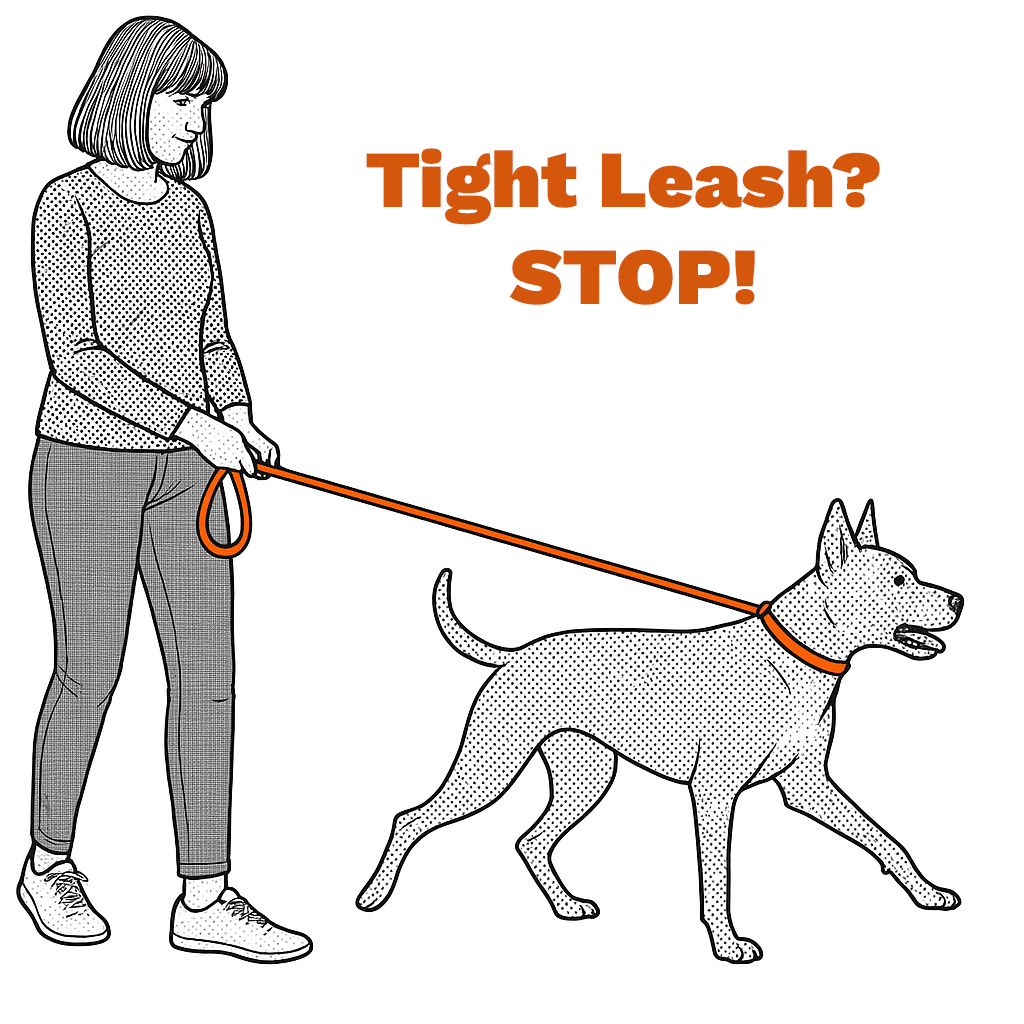
Leash pressure uses Negative Reinforcement: the pressure stops when the dog moves in the direction of the leash. The dog learns that moving makes the pressure go away, reinforcing this behavior.
Remember the two rules of leash pressure:
If pressure is turned on, it must stay on until the dog complies (stops resisting).
Once the dog complies the pressure must be turned off immediately (active release).

Prerequisites
Habituation to Equipment
Introduce new equipment gradually to your dog. Avoid putting it on and hoping for the best—dogs need time to adjust.
Steps:
Fit equipment: Do this in a separate session, a few days before the first walk.
Classical Conditioning:
Show each piece to your dog, then treat.
Put it on, treat-treat.
Make adjustments, treat-treat-treat.
Wear for 30 minutes: Intermittently treat for just wearing it. Play with your dog.
Take off: No treats for removal; the goal is to make wearing it more rewarding.
For some dogs, additional steps may be needed. For leashes, let your dog drag it around the house or yard to get used to it.
Martingale Collars
Slip Leads
Prong Collars
Training Space
Avoid rushing your dog's training by jumping straight into high-stimulation environments like walks around the neighborhood. Start in a calm, distraction-free area to build foundational skills, just like you would teach a child shapes and colors before advanced concepts.
Steps:
Neutral environment: Start indoors, in a garage, or a secluded area to focus on basic skills.
Use collar and harness: Practice with the collar for walking technique, and use the harness for outings like vet visits.
Gradual transition: Once your dog has learned the basics, transition to more stimulating environments like the neighborhood, using the collar for walks.
This approach builds strong motor skills without the distraction of external triggers like squirrels or skateboards.
Pick a Side
Choose a side for your dog to walk on. Consider:
Competition: For future competition, the left side is standard.
Pet dogs: It doesn’t matter which side, just pick one and be consistent.
Consistency will help your dog naturally gravitate to that side over time. If you have multiple dogs, train them individually first before integrating.
How to Hold the Leash
There are a few ways to hold a leash depending on the situation. As you get more comfortable and confident with your leash skills you can experiment. For this training though you should stick to the two handed approach.
Professional Anchor
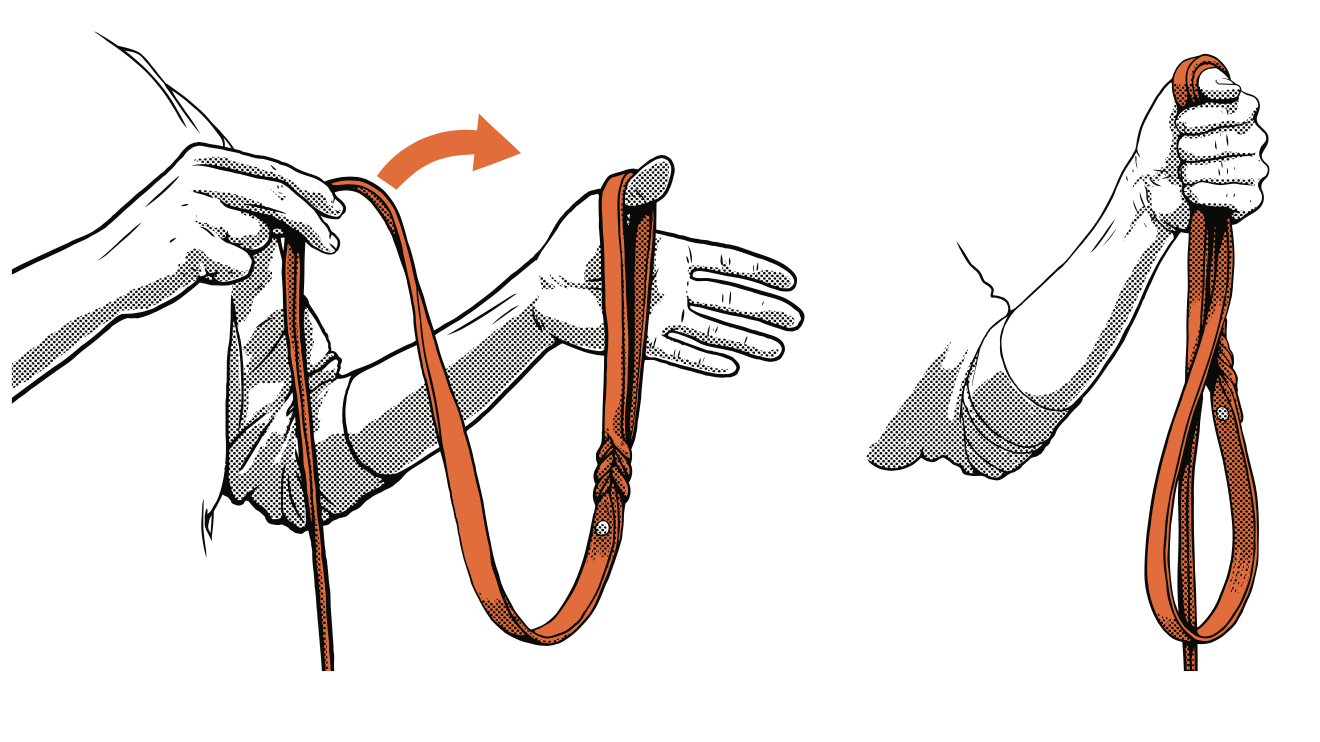
Position hands: Hold the leash in front of your body. The farthest hand from your dog will be your anchor hand, and the closer hand will be for targeting, luring, and rewarding.
Leash grip: The leash should exit from the pinky side of your palm, not the thumb side.
Thumbblock technique:
Hook the leash around your thumb.
Loop the strap around your thumb, then make a fist around it. (See diagram)
Benefits:
Provides secure, tight control.
Allows for quick and easy leash adjustments.
Uses your body for strength and sensitive control.
This method is effective with any leash.
Don’t Wrap!
Problems with wrapping:
Cumbersome: You need to unwrap to change leash length or use your hand.
Bulky: Reduces dexterity and control.
Risk of injury: Can cause "leash burn" or discomfort on large dogs.
Better solution: The anchor method (shown earlier) is more flexible, provides sensitive control, and avoids these issues.
Pinky Side! Pinky Side!
Leash exit: Always have the leash exit from the pinky side of your palm.
Why?: This aligns with your body’s natural mechanics, offering better control and strength.
Avoid: Exiting from the thumb side weakens your grip and makes it harder to manage your dog.
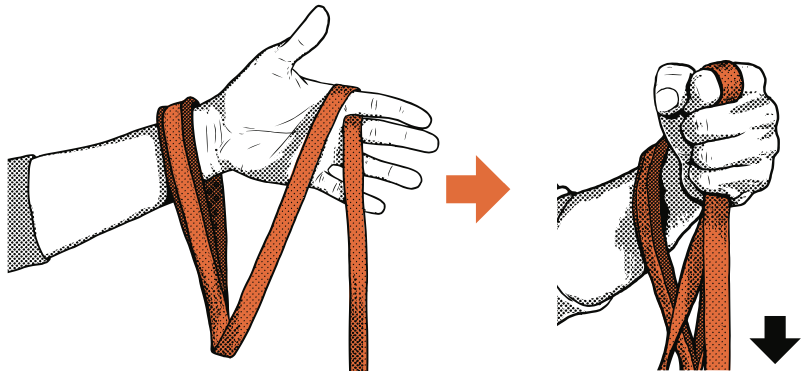
Small Hands? Try this Alternate Anchor
Fingerlock:
Hook the leash on your wrist.
Loop the strap around your index finger, then make a fist around it.
Benefits:
Secure, tight grip.
Quick adjustments to leash length.
This method works with any leash and provides great control, even for small hands!
Conditioning the Leash Pressure
(START HERE)
Teach your dog to understand how to turn off leash pressure. This involves conditioning the dog to respond reliably to pressure or avoid creating it.
Spend a few training sessions, or more, to achieve automatic responses from your dog.
This step is not about walking yet—it's about teaching your dog to either give into the pressure or avoid it.
Leash Pressure Session One
Leash Pressure Session Two
Center of the Universe Game
Steps to Teach Leash Pressure
Position: Stand in front of your dog facing each other. Slowly apply pressure to the leash towards you (leash parallel to the ground).
Increase Pressure: Apply slight pressure, but don't pull or move the dog. If needed, use a lure to assist them.
Lure: With a treat in hand, lure your dog in the direction of the pressure. As soon as they move forward even slightly, release the pressure.
Mark and Reward: When they move to relieve pressure, mark the behavior and reward them.
Repeat Front and Behind: Repeat this process from both in front and behind. When pulling from behind, angle the leash left or right to guide them to turn.
Sit & Down: Use leash pressure to teach sit and down:
For sit: Apply slight upward pressure, lure the dog into a sit, remove pressure and reward once the butt hits the ground.
For down: Apply light downward pressure, lure the dog into a down, remove pressure and reward once the elbows touch the ground.
Key Concept: By luring after applying pressure, the dog learns that moving in the direction of the pressure leads to relief, which is followed by something they like. Only release the pressure when the desired behavior is completed.
Key Notes on Leash Pressure
Pressure & Release:
Applying pressure tells the dog "I need you to change what you're doing."
Releasing pressure says "Good job, keep doing that." Focus on the timing of the release.
Dog's Response:
As you practice, you'll notice the dog turning around on its own when they reach the leash's end, without prompts.
They may start sitting before you even lift the leash.
Direction of Movement:
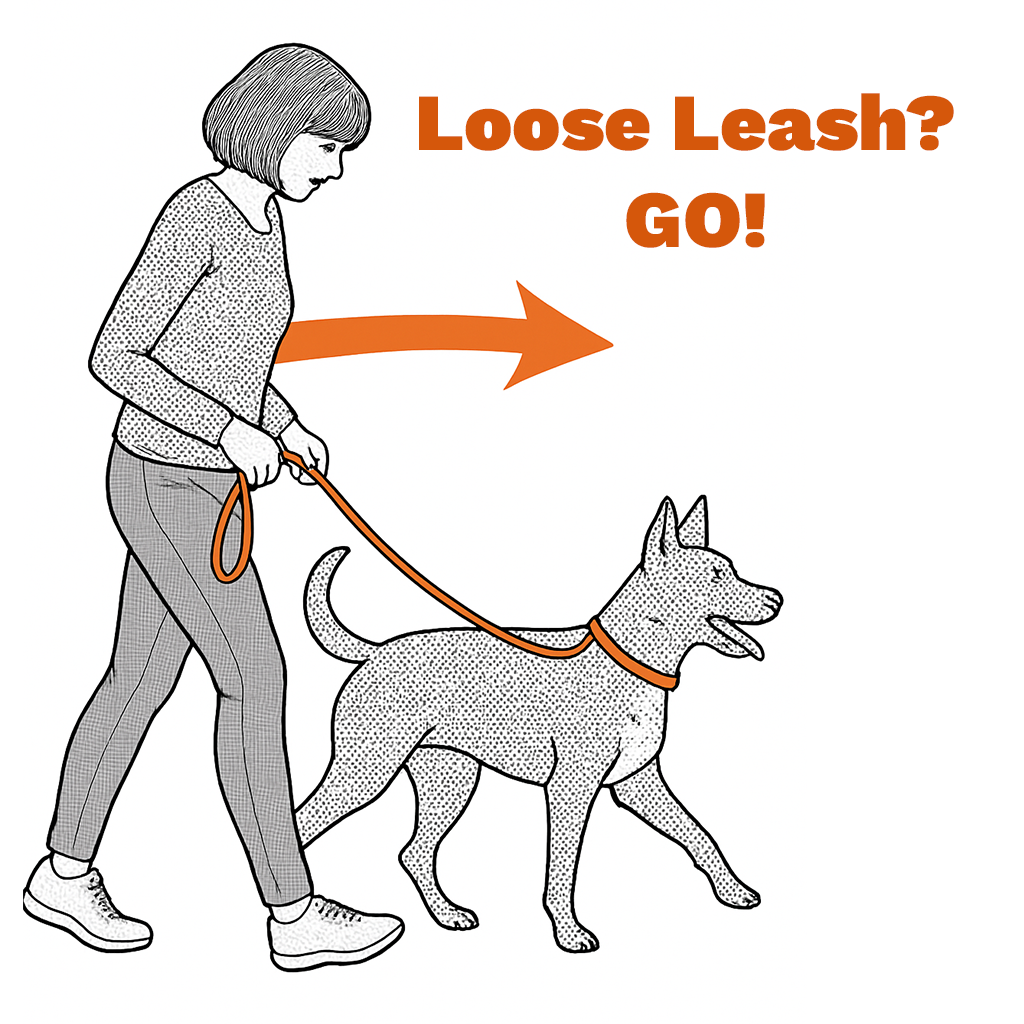
Start moving in the direction you applied pressure to help the dog understand that moving toward the pressure will relieve it. They should follow you as you walk away.
Training Time:
Leash pressure training should take no more than 2-3 sessions in a calm environment. Training outdoors or with a dog accustomed to pulling may take longer.
Loose Leash Walking Exercises
Below are exercises to continue to help your dog learn to avoid the end of the leash (impulse control), check in with you more often (engagement), and walk nicely on a loose leash.
Leash Pressure/Loose Leash Lesson
Up Down Pattern Game
Lazy Loose Leash Walk
U-Turn/Turn Around Method (Active Release):
Practice indoors first: Walk with the dog on leash and, when they go in any direction, turn the opposite way.
Apply pressure with the leash, keeping it parallel to the ground at the dog's level.
Release the pressure when they stop resisting, then move in the new direction.
Mark with “Free” when they turn and give into the pressure and reward them in the heel position.

Stop & Go:
Place an object of interest away from your dog.
Only move toward the object if the leash isn’t tight. If tight, stop and wait.
No verbal cues—just stop and go based on leash tightness.
Tug & Release:
Use this method only after your dog understands leash pressure.
When your dog hits the end of the leash, stop and wait 1 second for them to comply.
If they don’t comply, give a quick tug toward you, then immediately release the pressure.
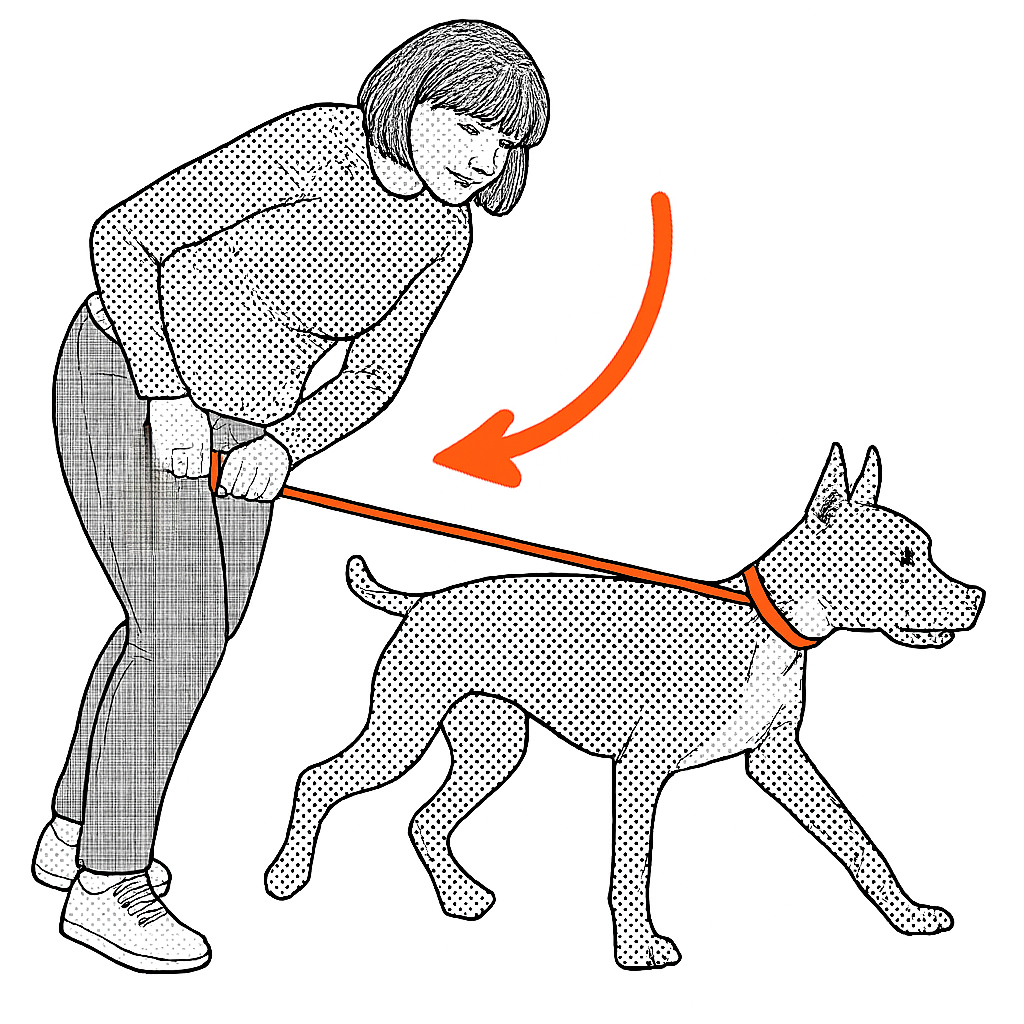
180 Self Correction:
When the dog starts getting ahead of you, drop the slack in the leash so you are holding just the end of the leash in your anchor hand near your navel.
Turn 180 degrees quickly and keep walking in the opposite direction of the dog.
If the dog doesn’t turn with you they will hit the end of the leash and “self correct.”
Reward them when they catch back up to you.
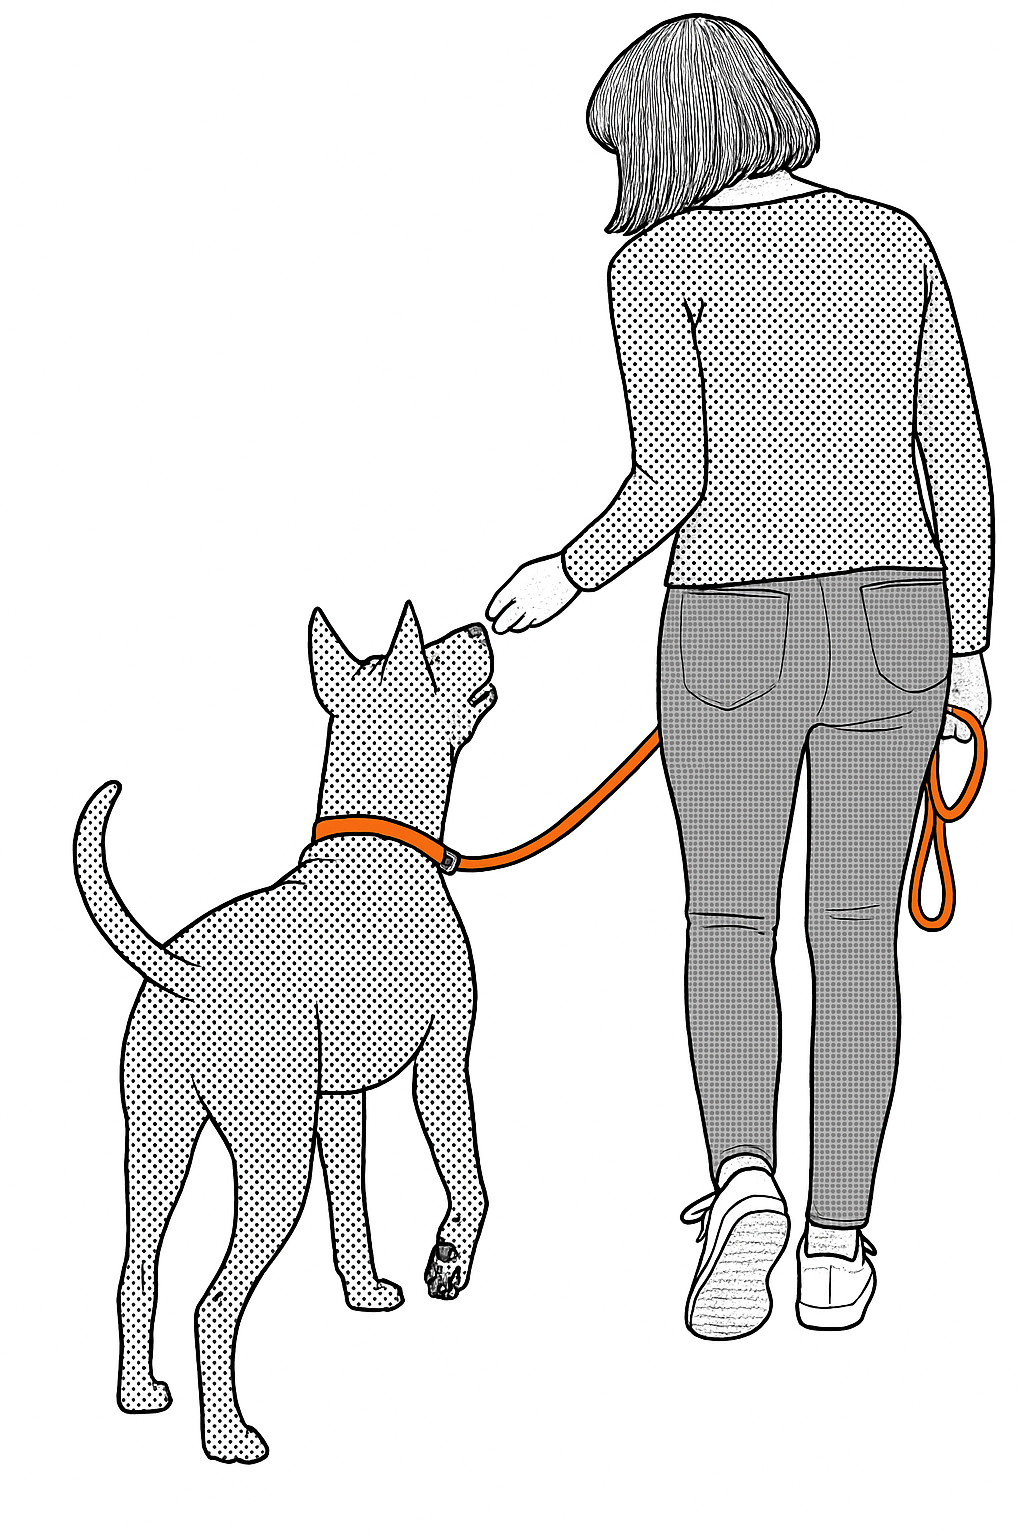
Bring Back to Heel and Pause:
Use this technique if you dog tends to “Boomerang” back to the end of the leash every time
When the dog hits the end of the leash, stop moving and maintain leash pressure.
Once they comply, release pressure and lure them back into the heel position.
Reward frequently while they’re in the heel position to help keep them there.
Resume walking and continue rewarding rapidly to help them stay close.
Homework
Remember the two rules of leash pressure:
If pressure is turned on, it must stay on until the dog complies (stops resisting).
Once the dog complies the pressure must be turned off immediately (active release).
Practice moving slowly. We want to be able to give the dog time to see what’s happening and anticipate. It should only take 1-2 days training this 1-3x a day before they seem to get it and are ready to move onto other rooms/outside. But it may take longer. Training takes as long as it takes.
Once they are anticipating every move before you can apply much pressure and don’t need the lures then start moving to other rooms/Outside. Always going back in steps (adding the lure back) if needed to help them remember and generalize the behavior.
EVERY TIME the dog goes to the end of the leash you must not let them be able to pull forward. Stop. Keep even pressure on the leash. Present the lure. Mark and release pressure when they move into the pressure turning it off themselves. Reward.